Catapult Annotation Editor
A Shiny web app for a more robust experience editing, adding, and importing annotations into the Catapult OpenField system.
An important but underutilized tool in Catapult's ecosystem is its annotations. Annotations are a fantastic way to provide additional grouping in your session beyond just periods — from marking timestamps of plays to specific periods within a game. Having annotations allows Sport Scientists and coaches to gather in-depth information about how their team is performing in any given situation.
API Token Setup
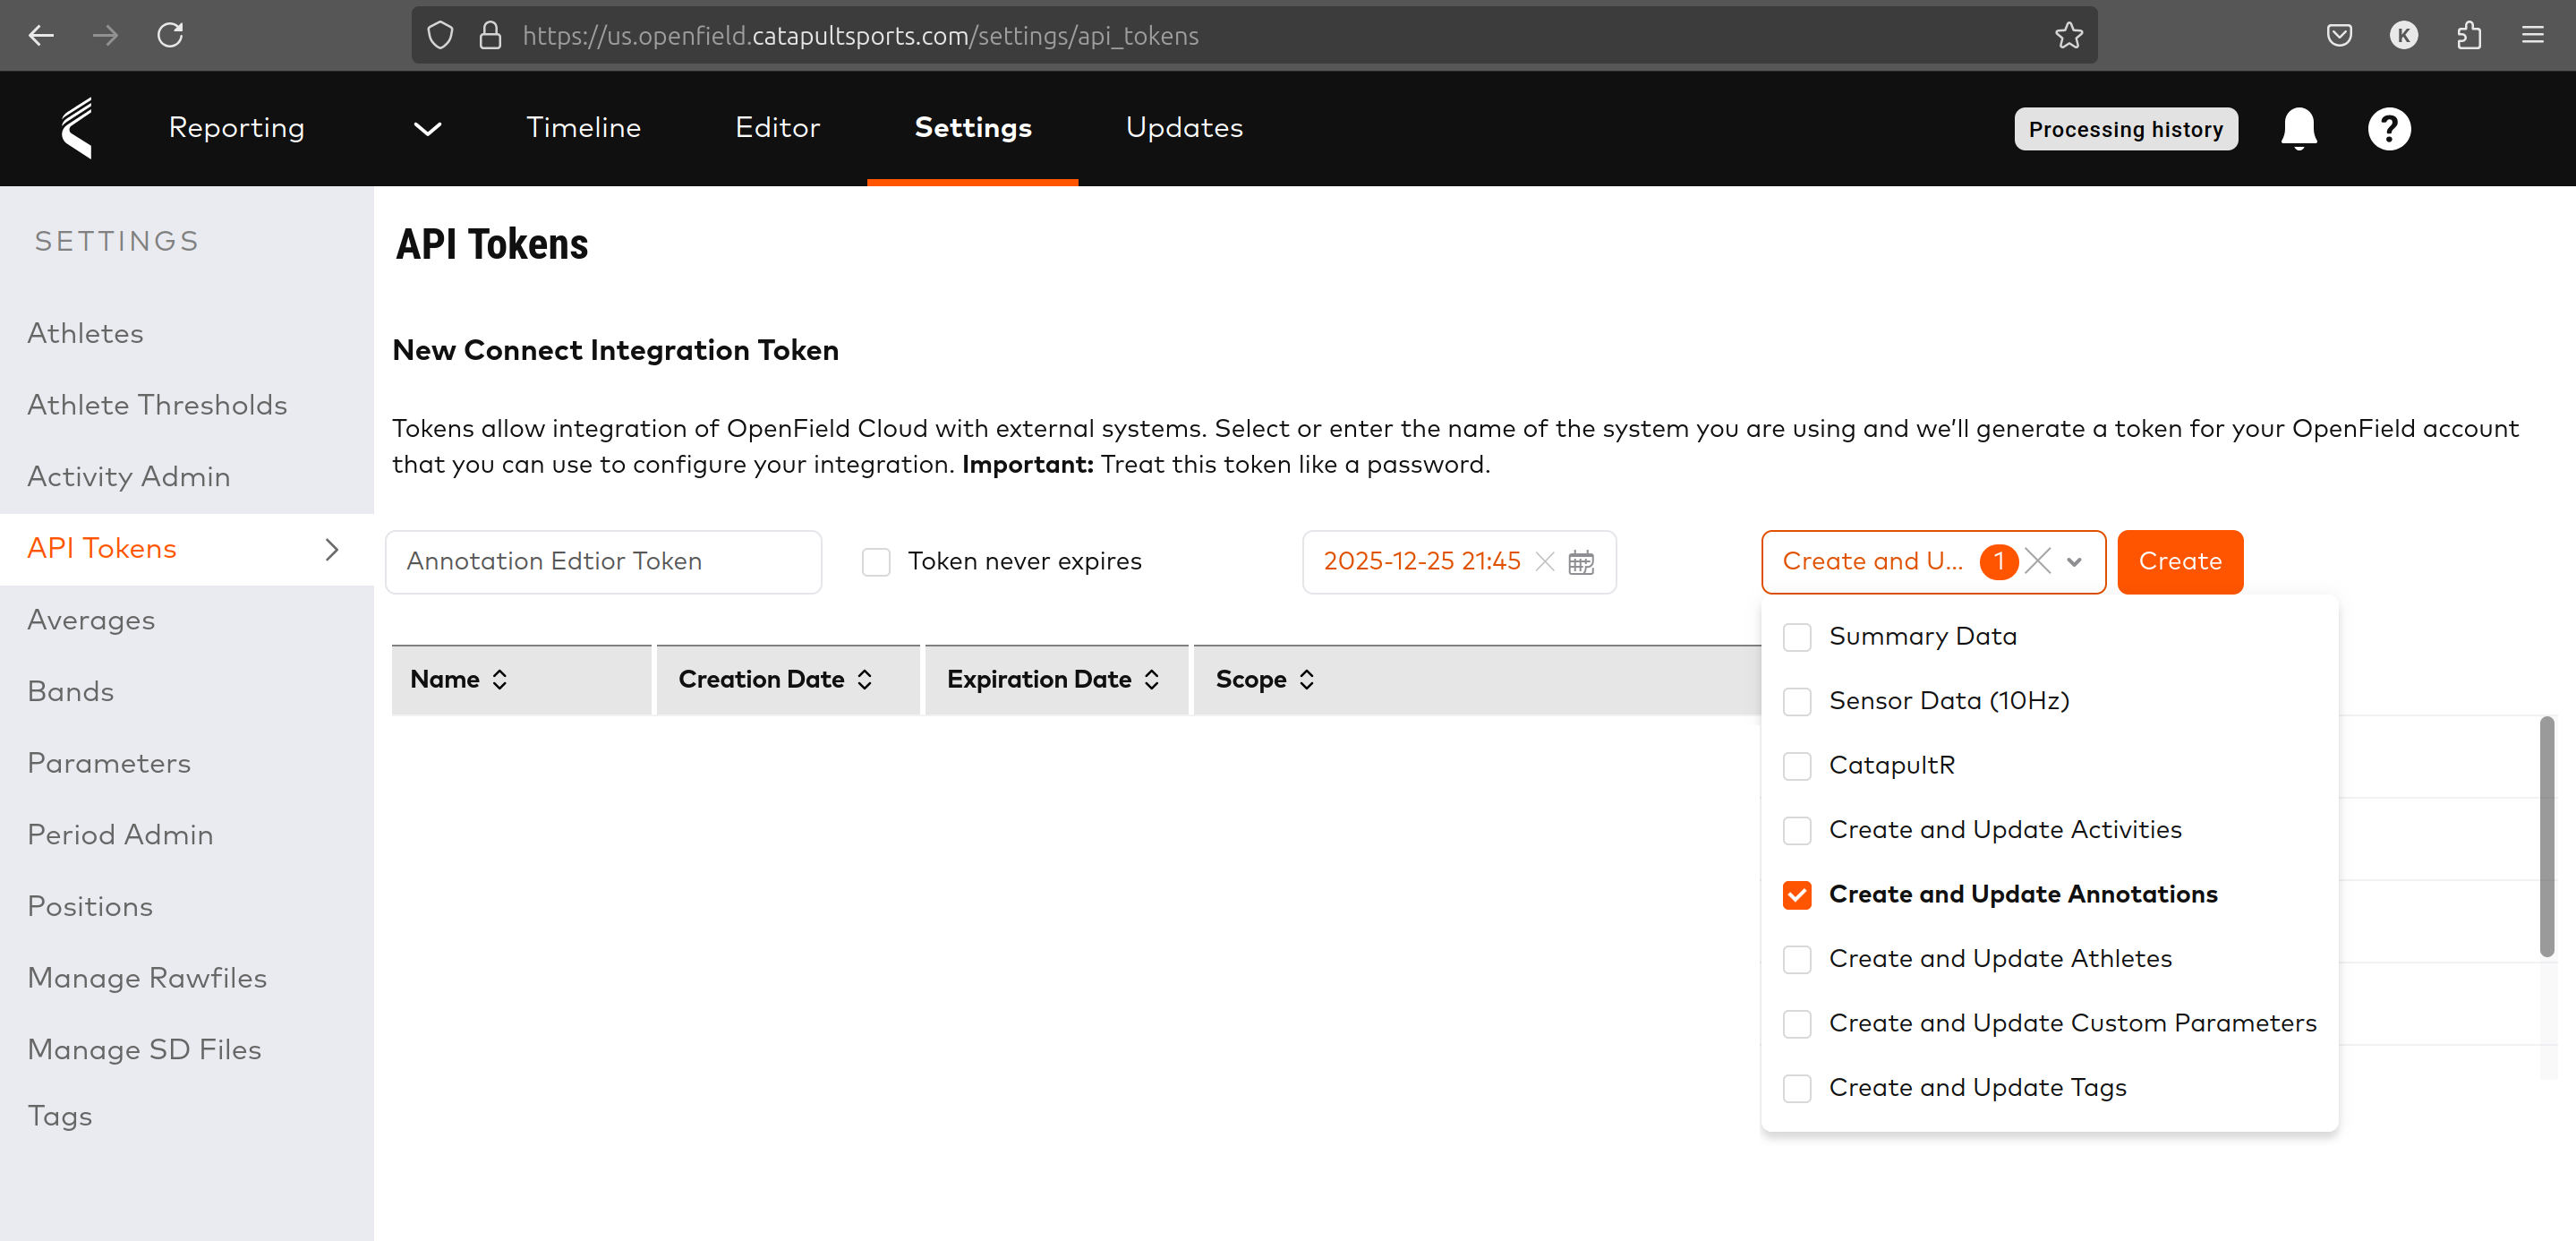 Catapult API Token settings screen
To begin, generate an API token with permissions to Create and Update Annotations. Navigate to Settings → API Tokens in OpenField Cloud. Enter a name for the token, set an expiration (or select "Never expire"), then click Scope and grant Create and Update Annotation permissions.
Getting Started
Once you have your API token, you can use the cloud-hosted version linked above. The web app does not save your API key, and all data pulled from OpenField is deleted at the end of your session.
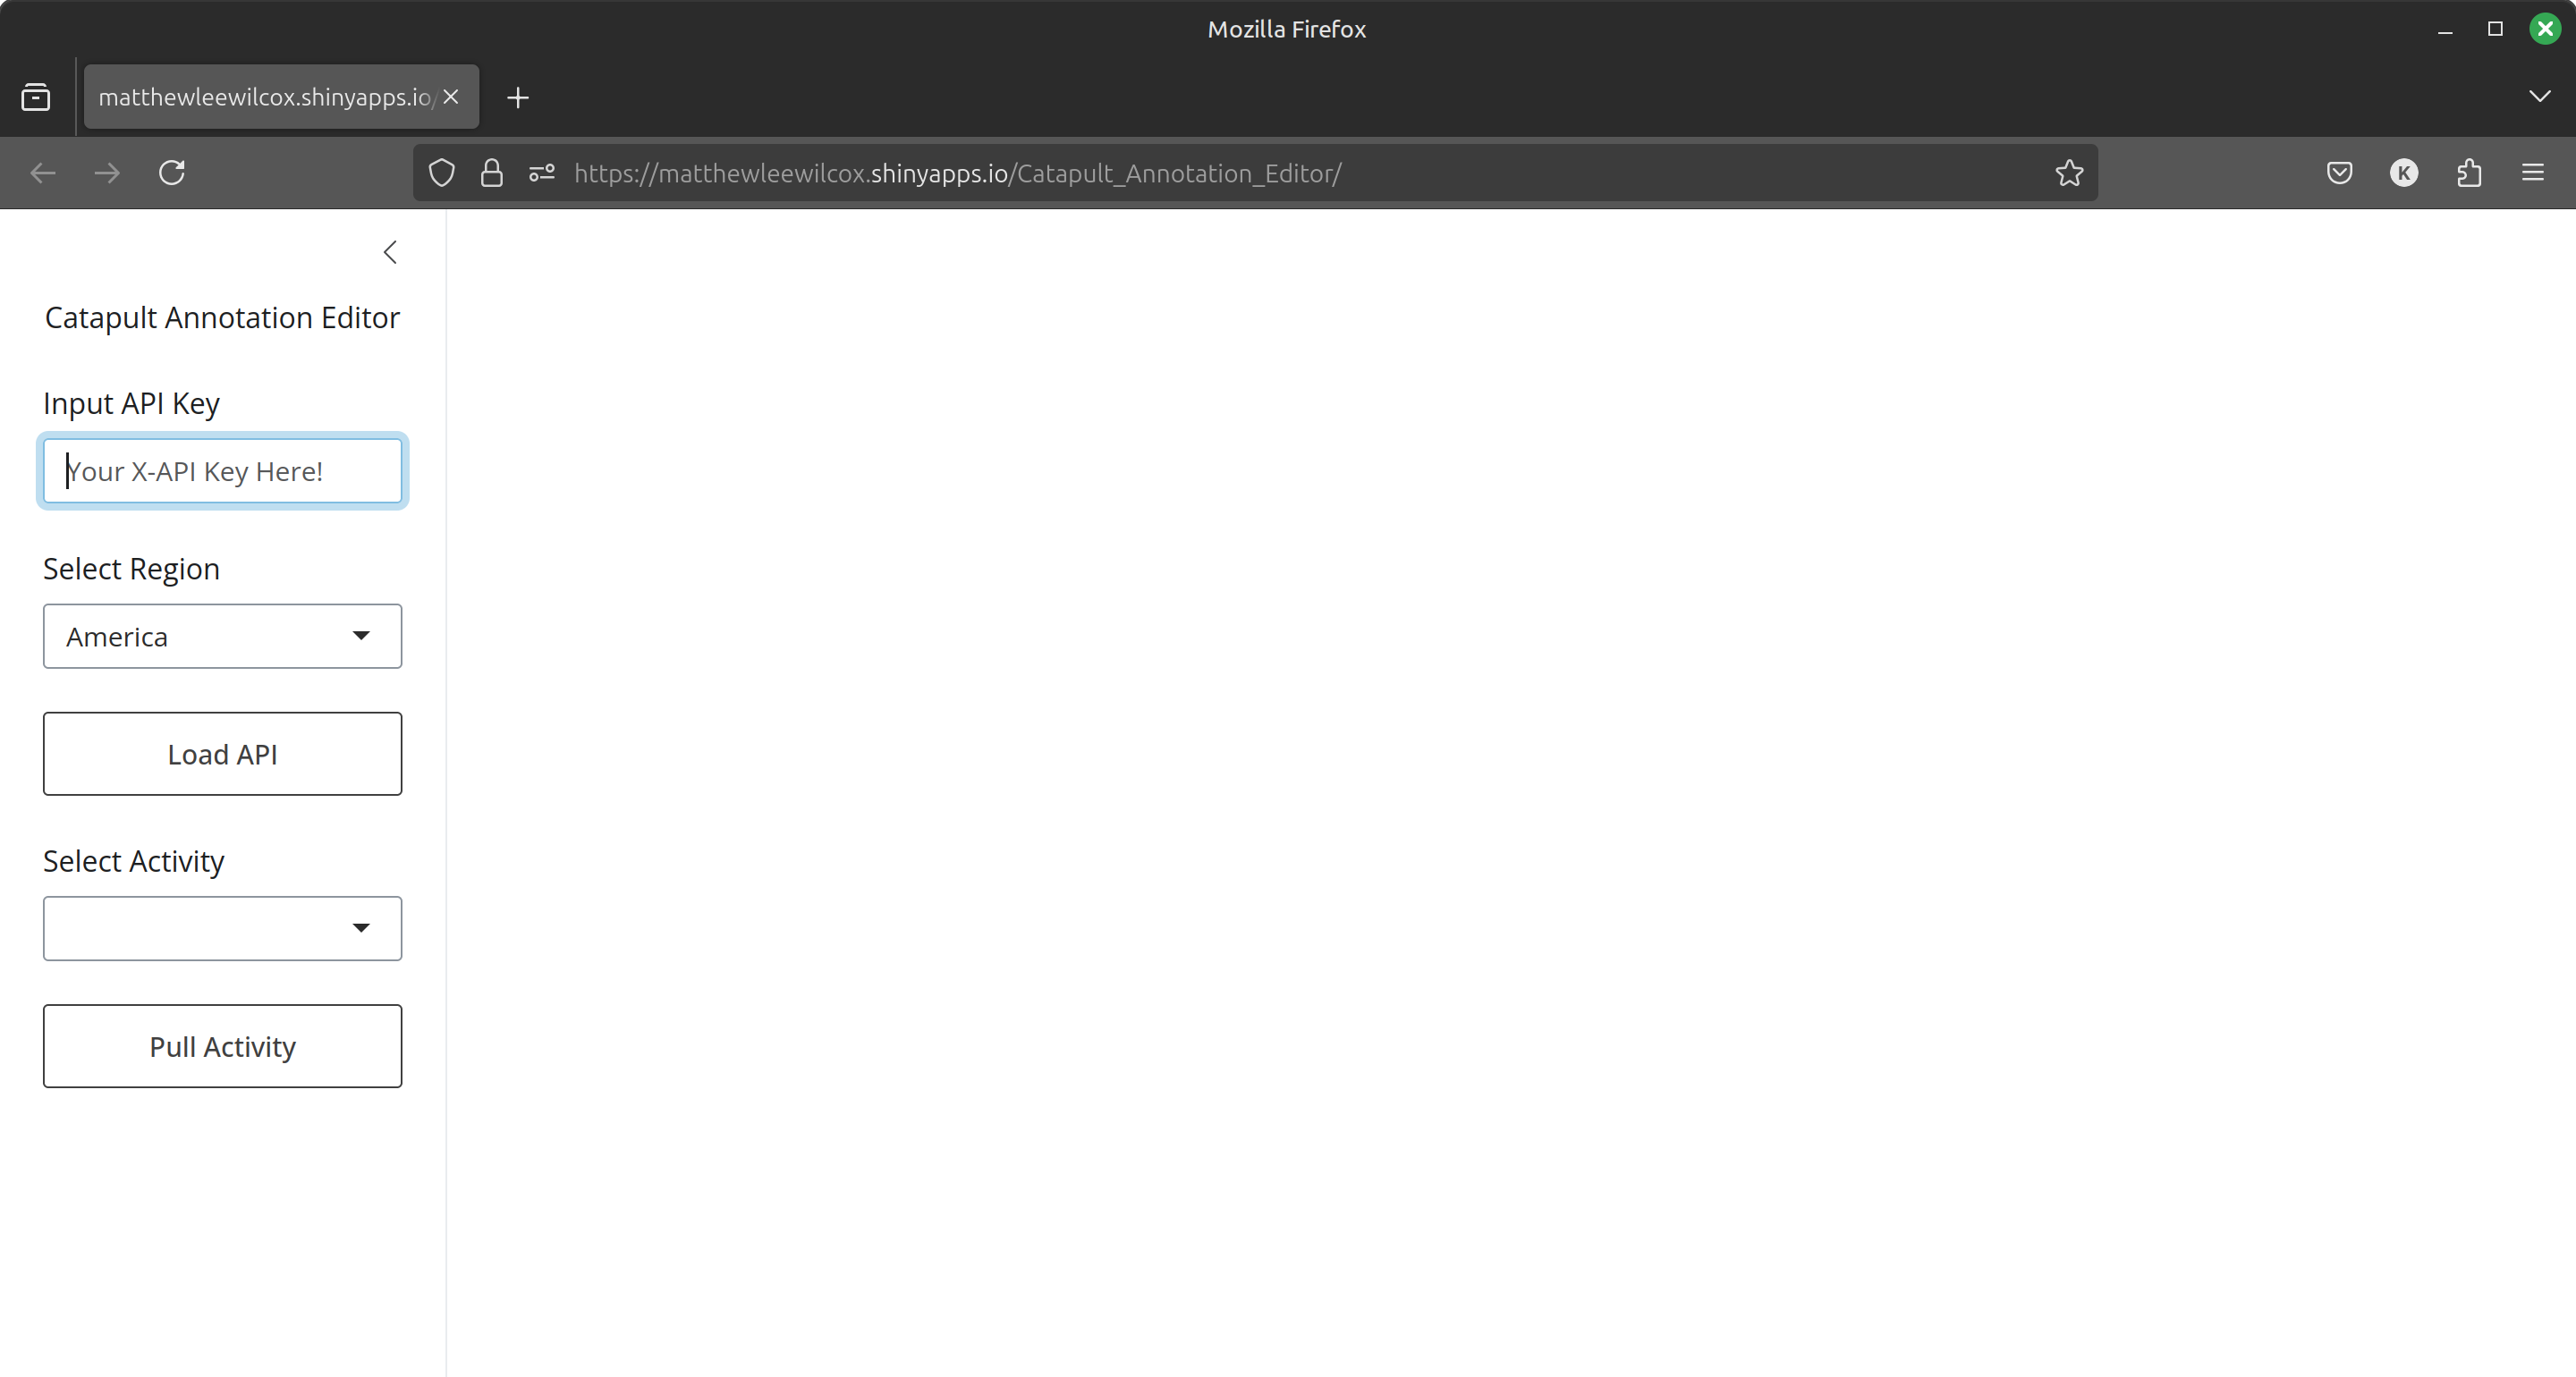 Annotation Editor — main interface
Enter your API token key in the Input API Key box, then select your region so the editor pulls from the correct Catapult servers. Click Load Activity — this may take a moment.
Selecting an Activity
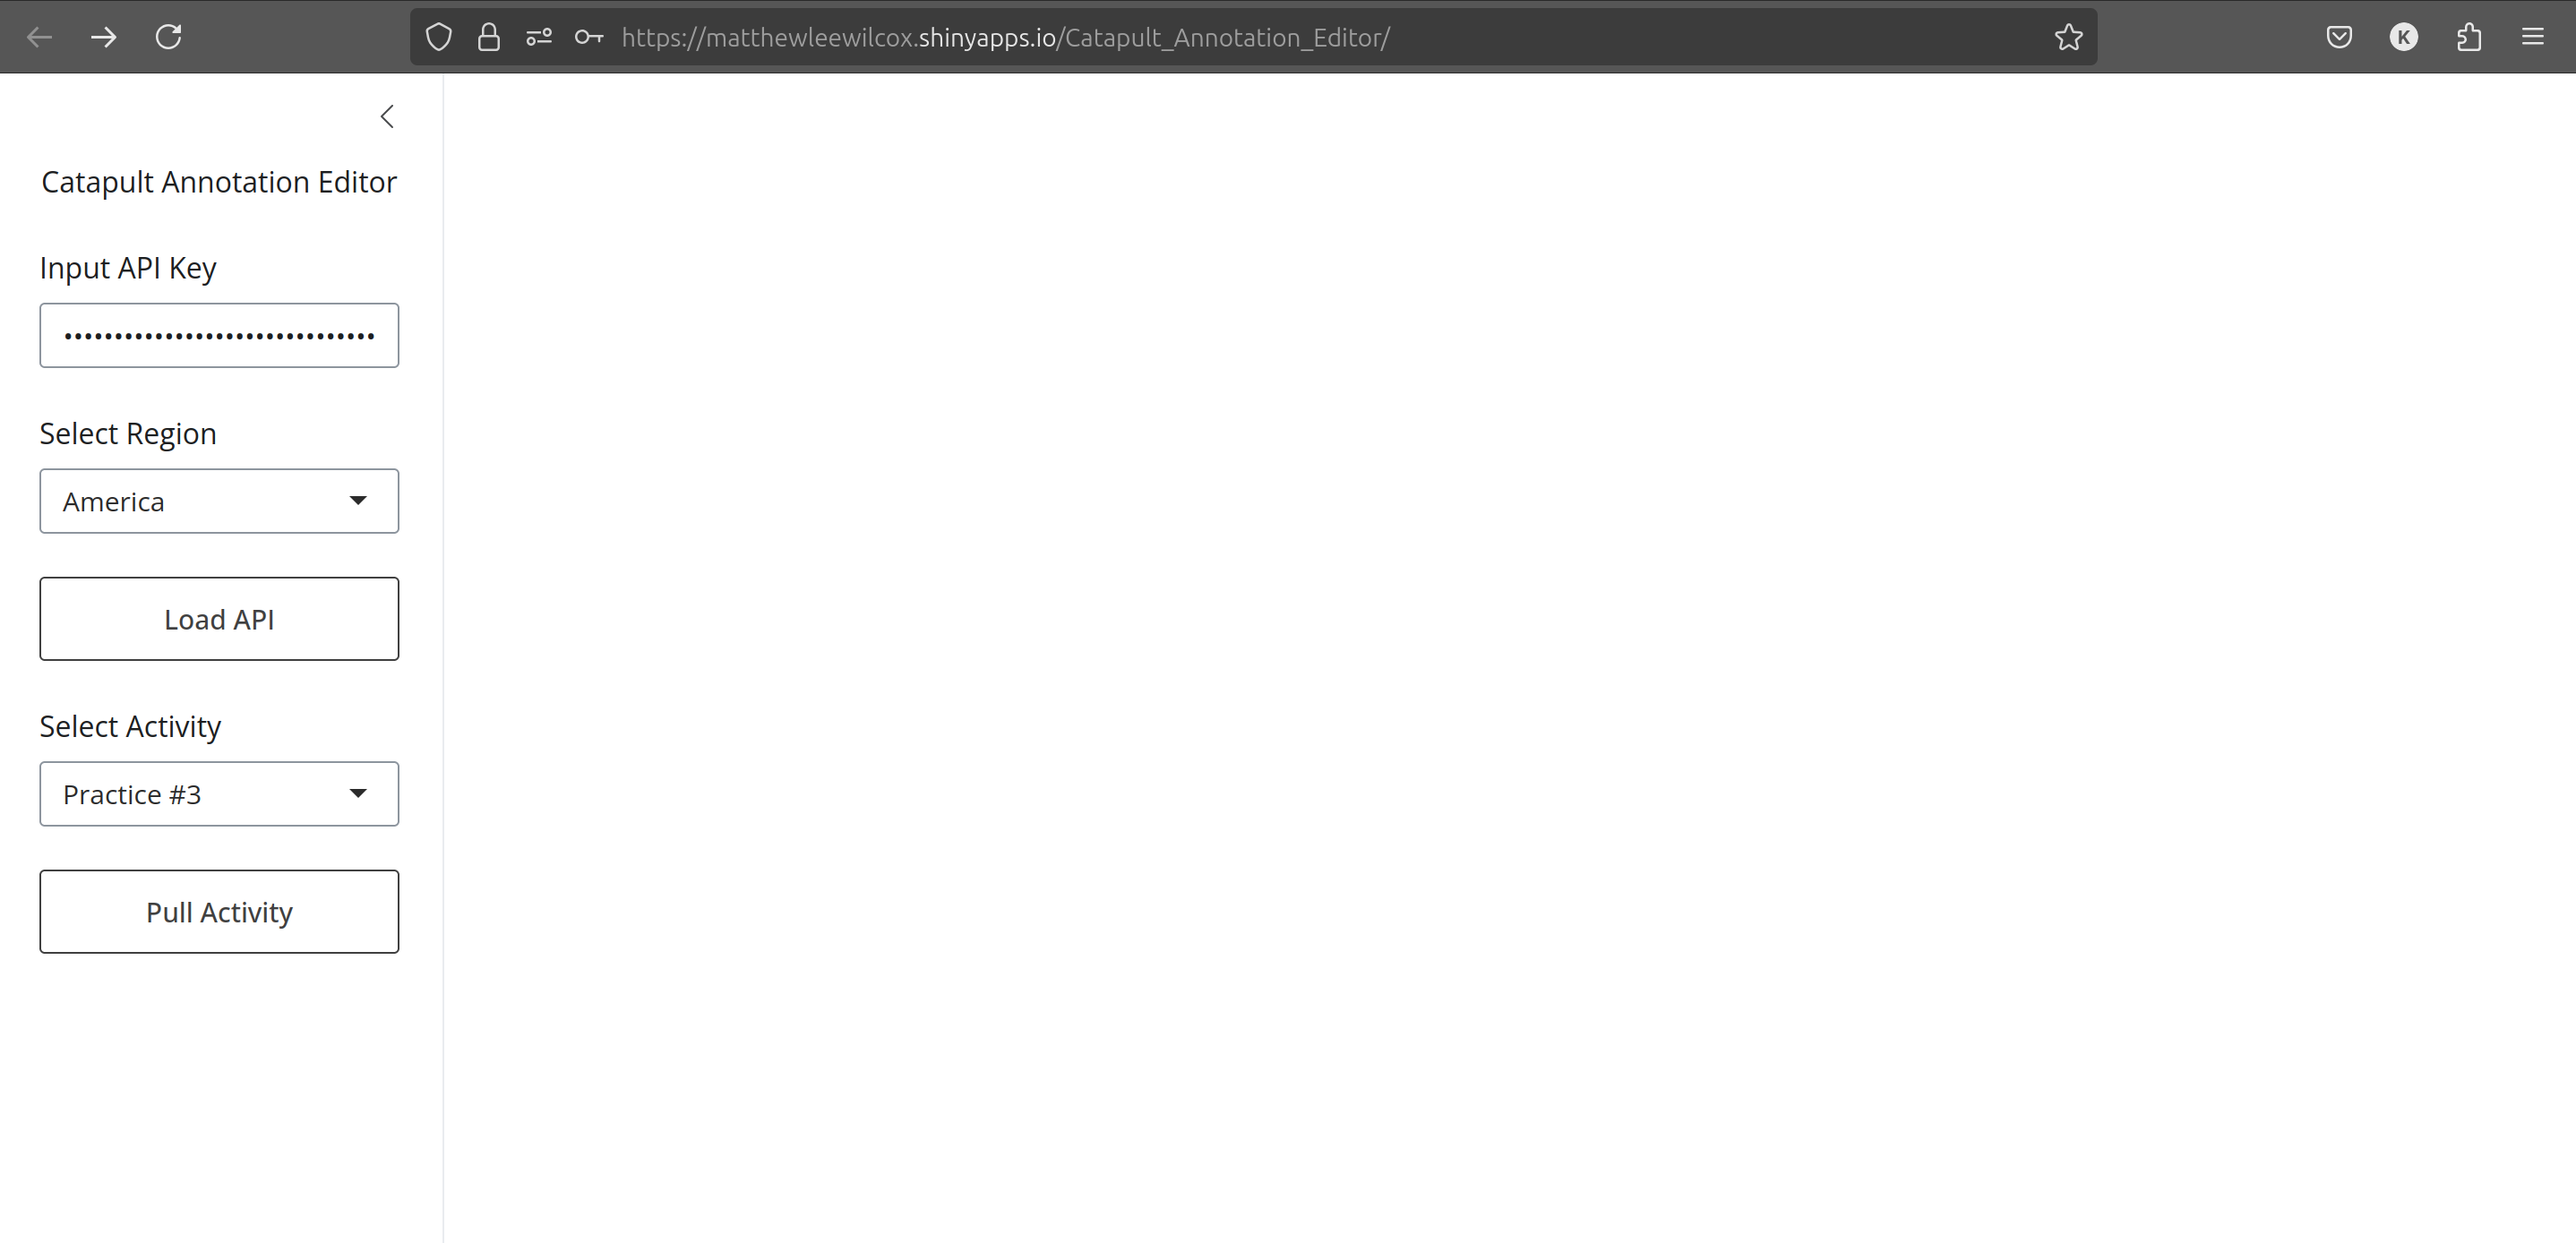 Activity selector populated
Once connected to OpenField Cloud's database, the activity selector will populate. Choose the activity you want to annotate and pull it into the editor.
 Activity loaded in editor
Updating Annotations
Click any annotation in the activity. Its details will appear on the right-hand panel where you can edit them. The Parent ID references the annotation layer your annotation belongs to. An annotation layer has category "layer" and Parent ID "000000000-0000-0000-0000-00000000000".
Note: Changing the Category ID will delete and re-add the annotation rather than update it, due to limitations in the Catapult Connect API.
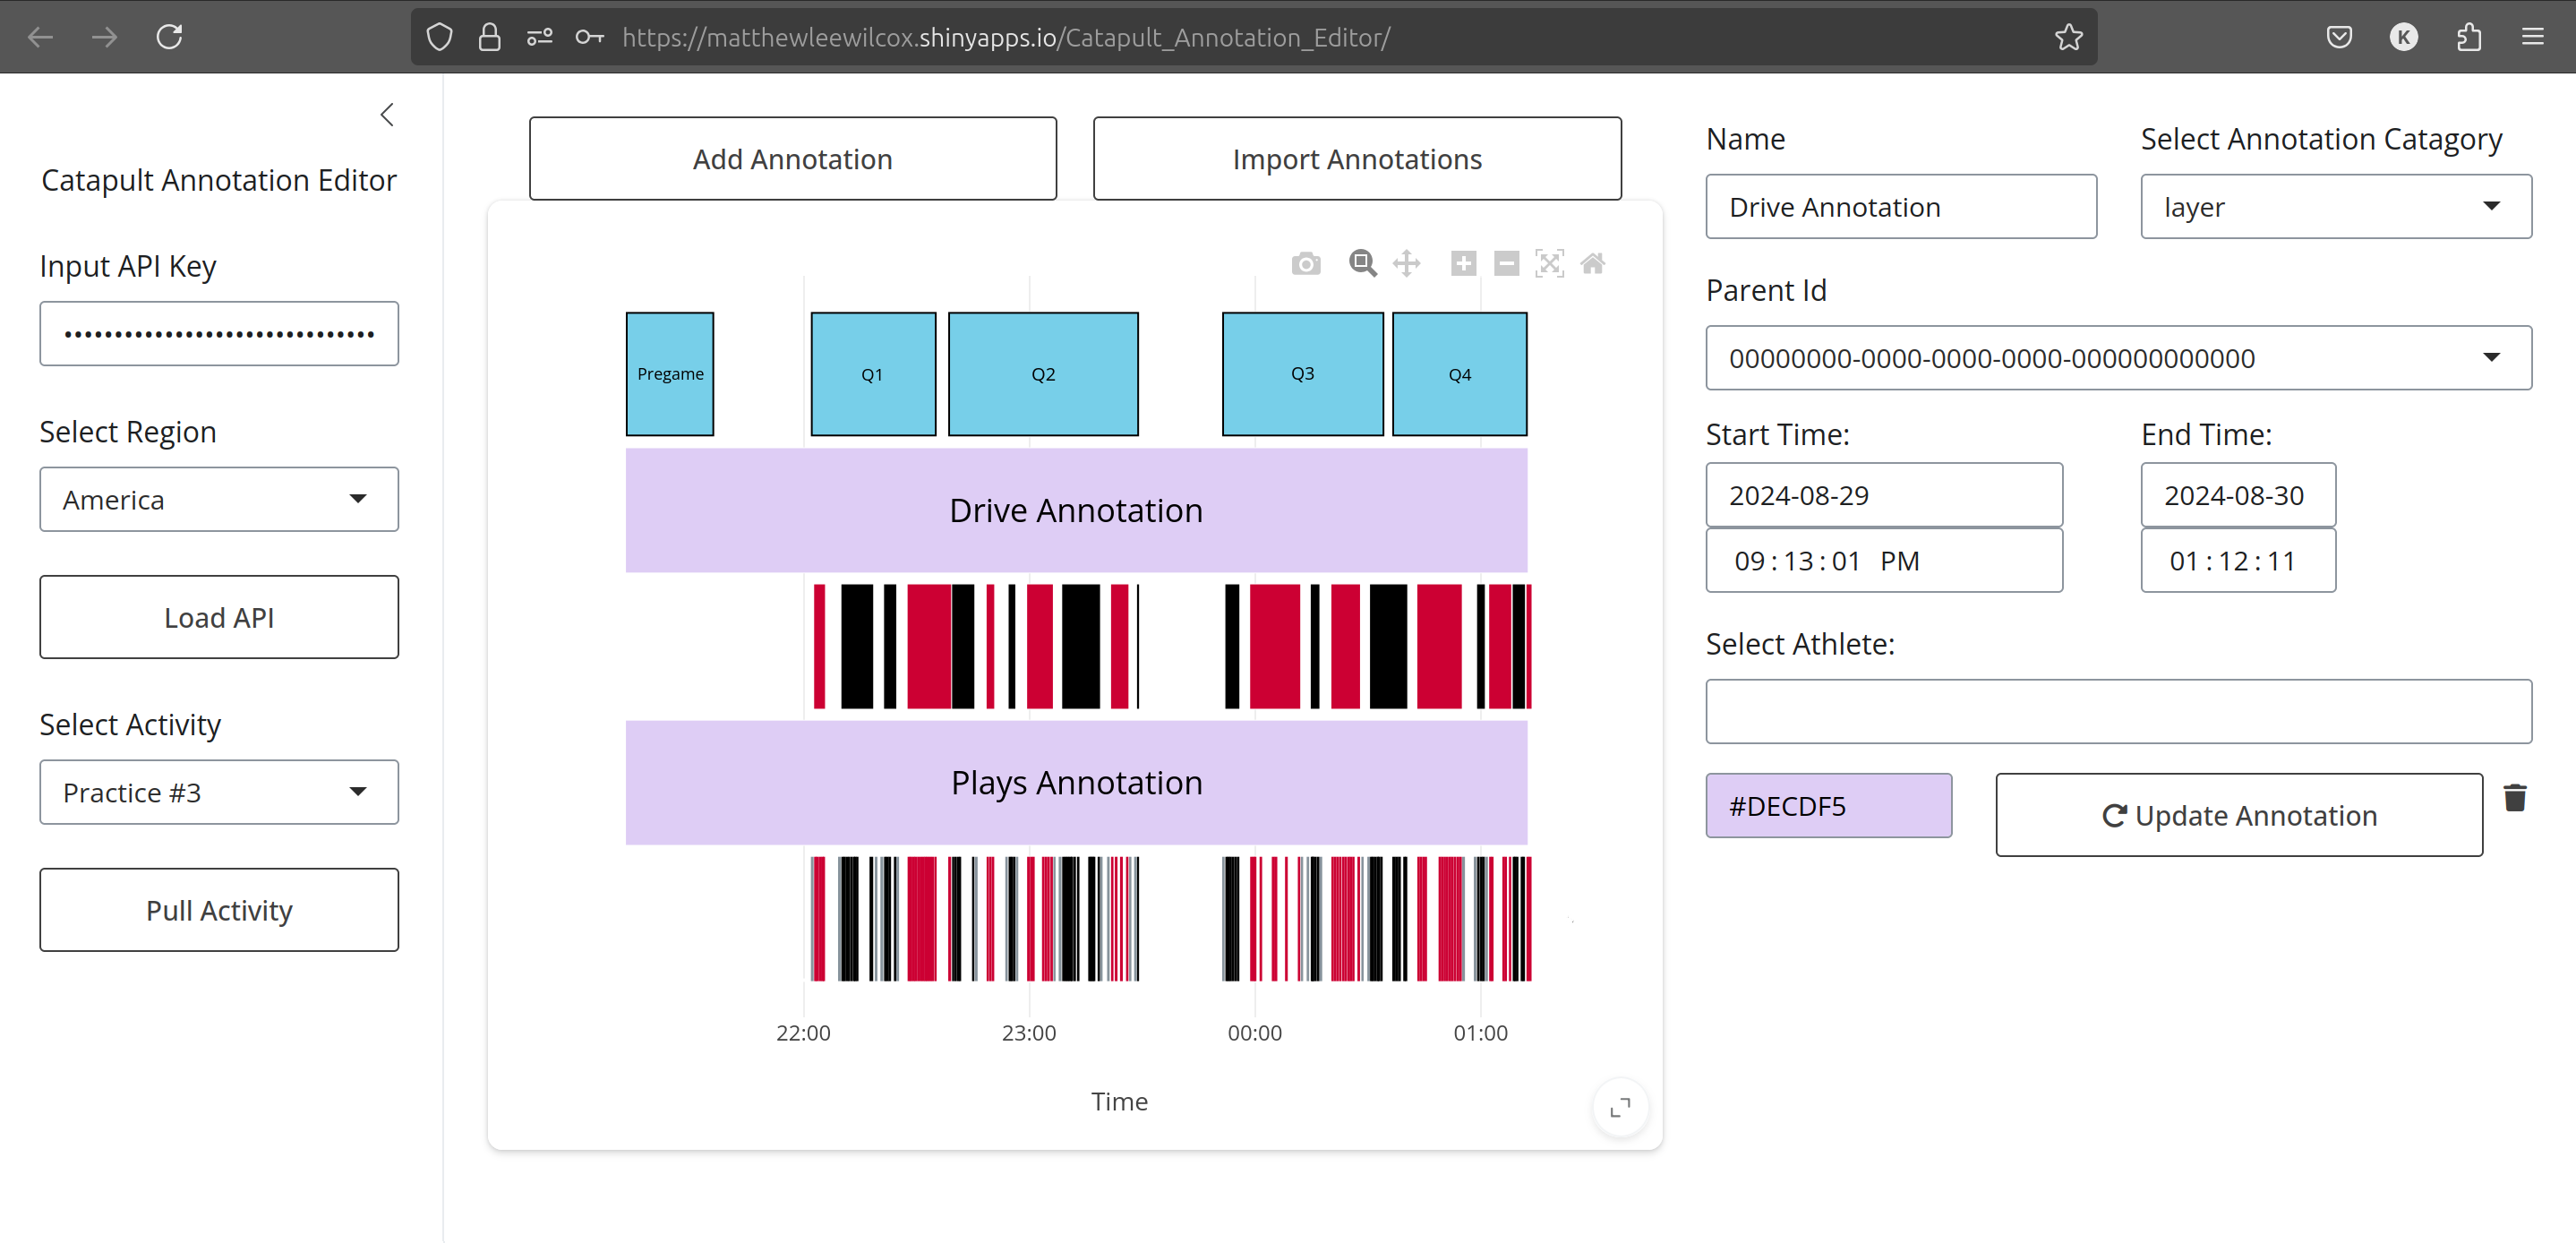 Annotation update panel
Adding Annotations
Click Add Annotation at the top of the console. Fill in all annotation data. For a new annotation layer, set the category to "layer" and Parent ID to "000000000-0000-0000-0000-00000000000".
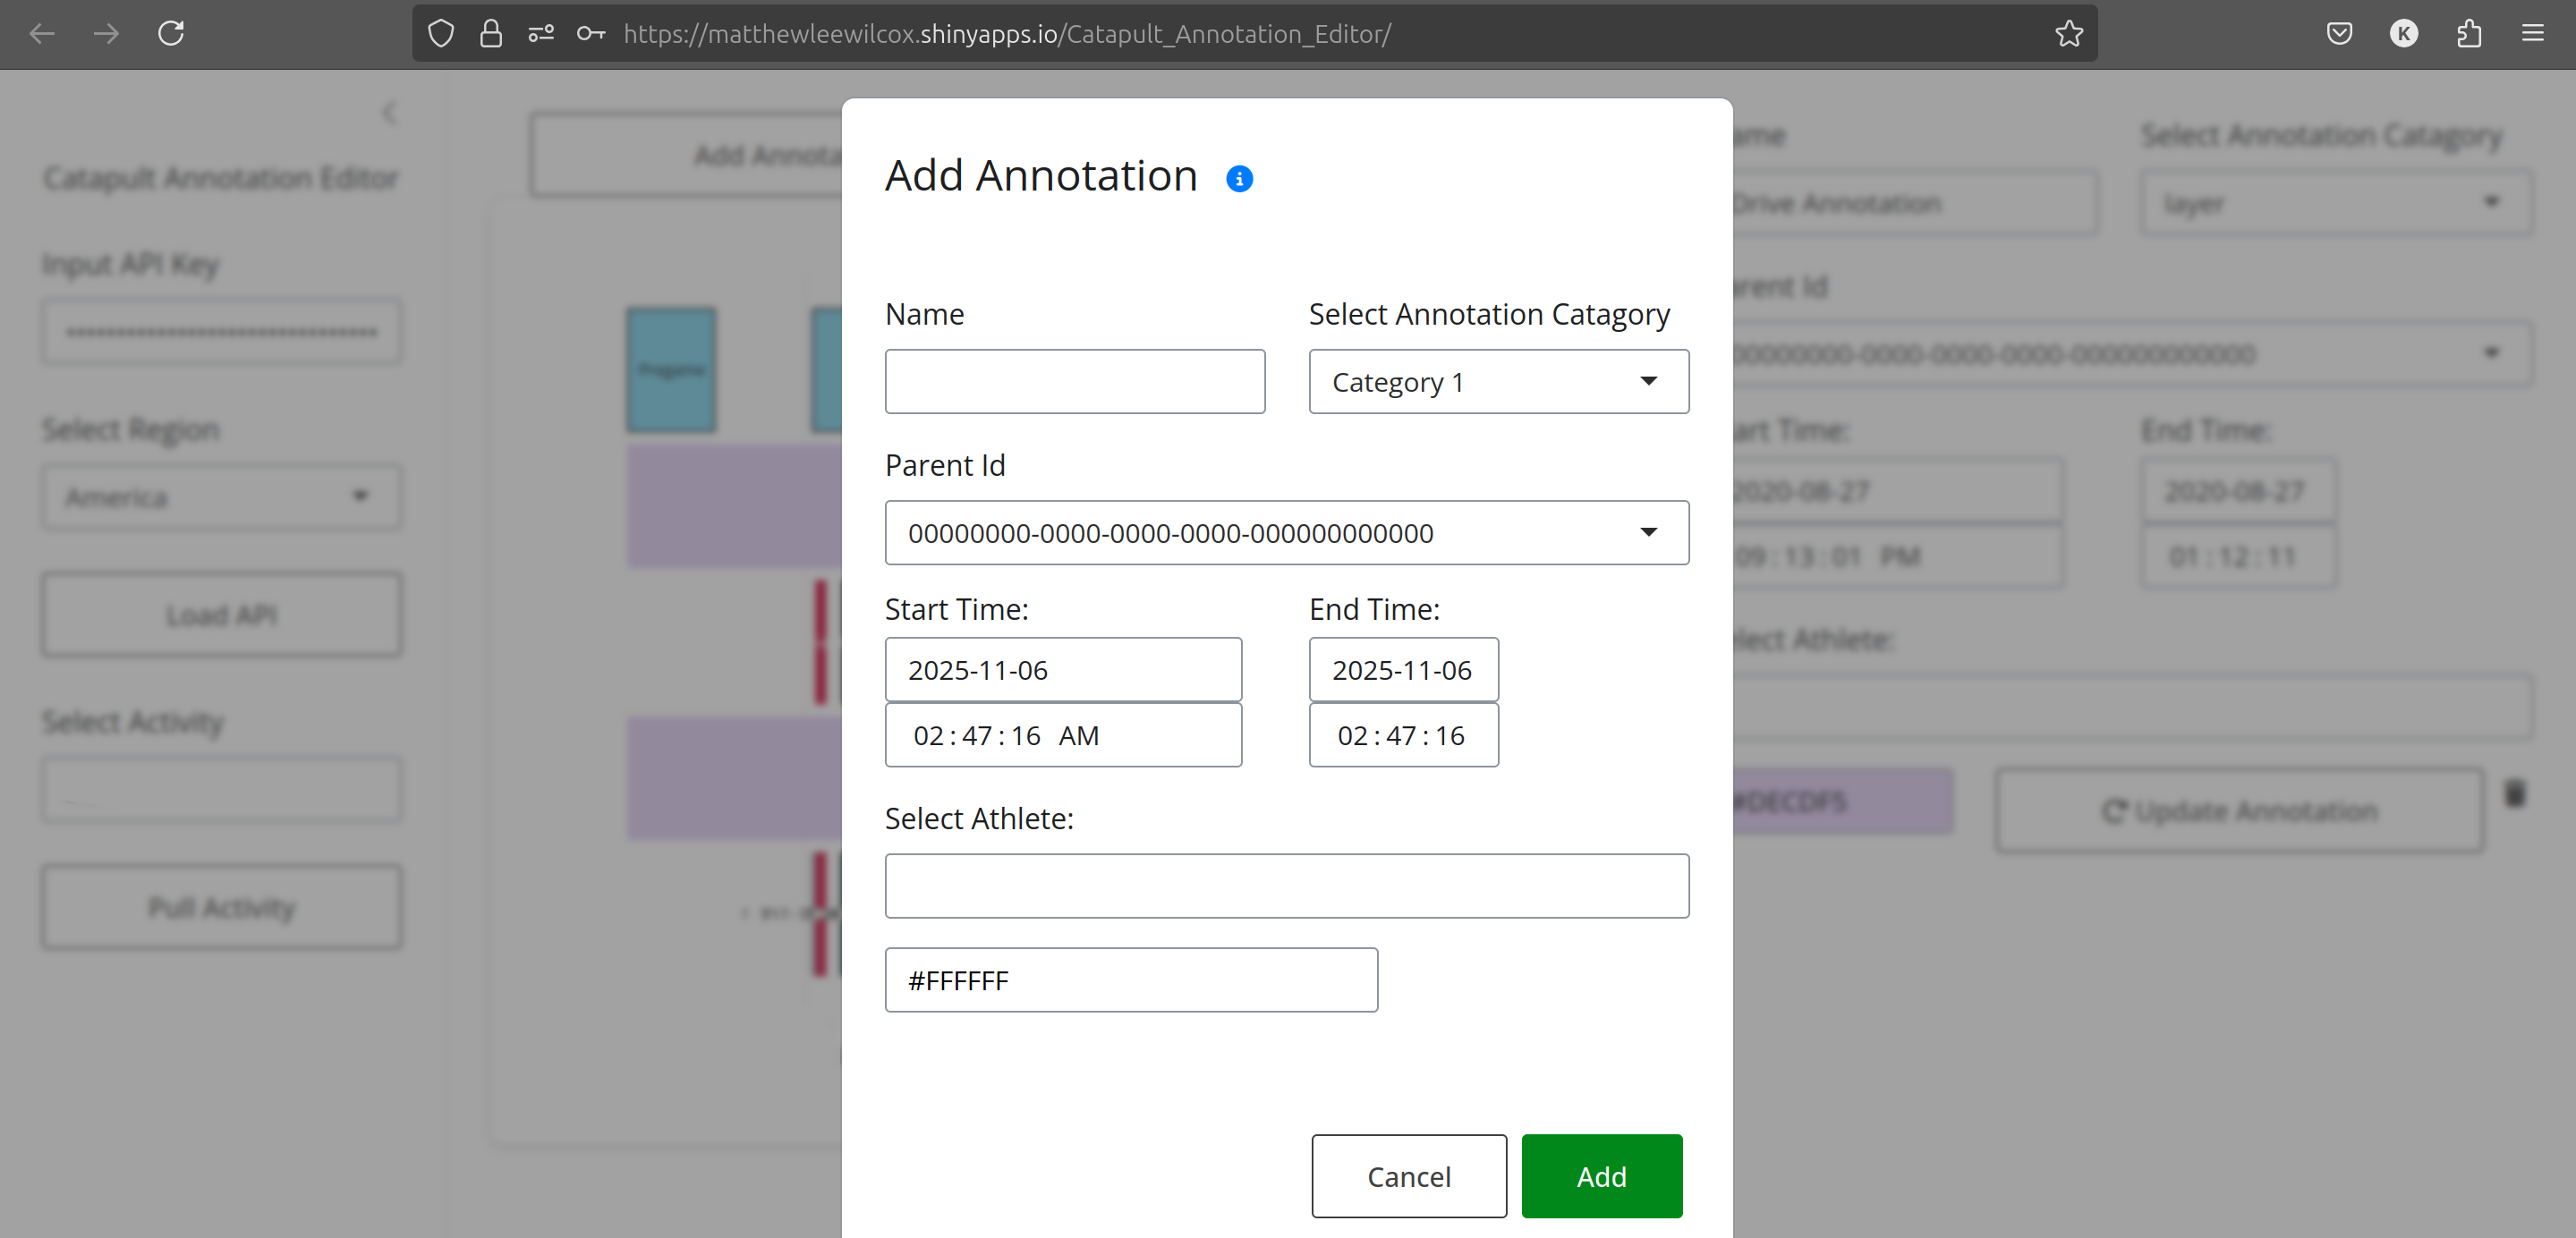 Add annotation dialog
Importing Annotations in Bulk
You can mass-import annotations from a CSV file. Click Import Annotations and download the template. Fill in your annotations and upload the file. You can either create a new annotation layer or import into an existing one.
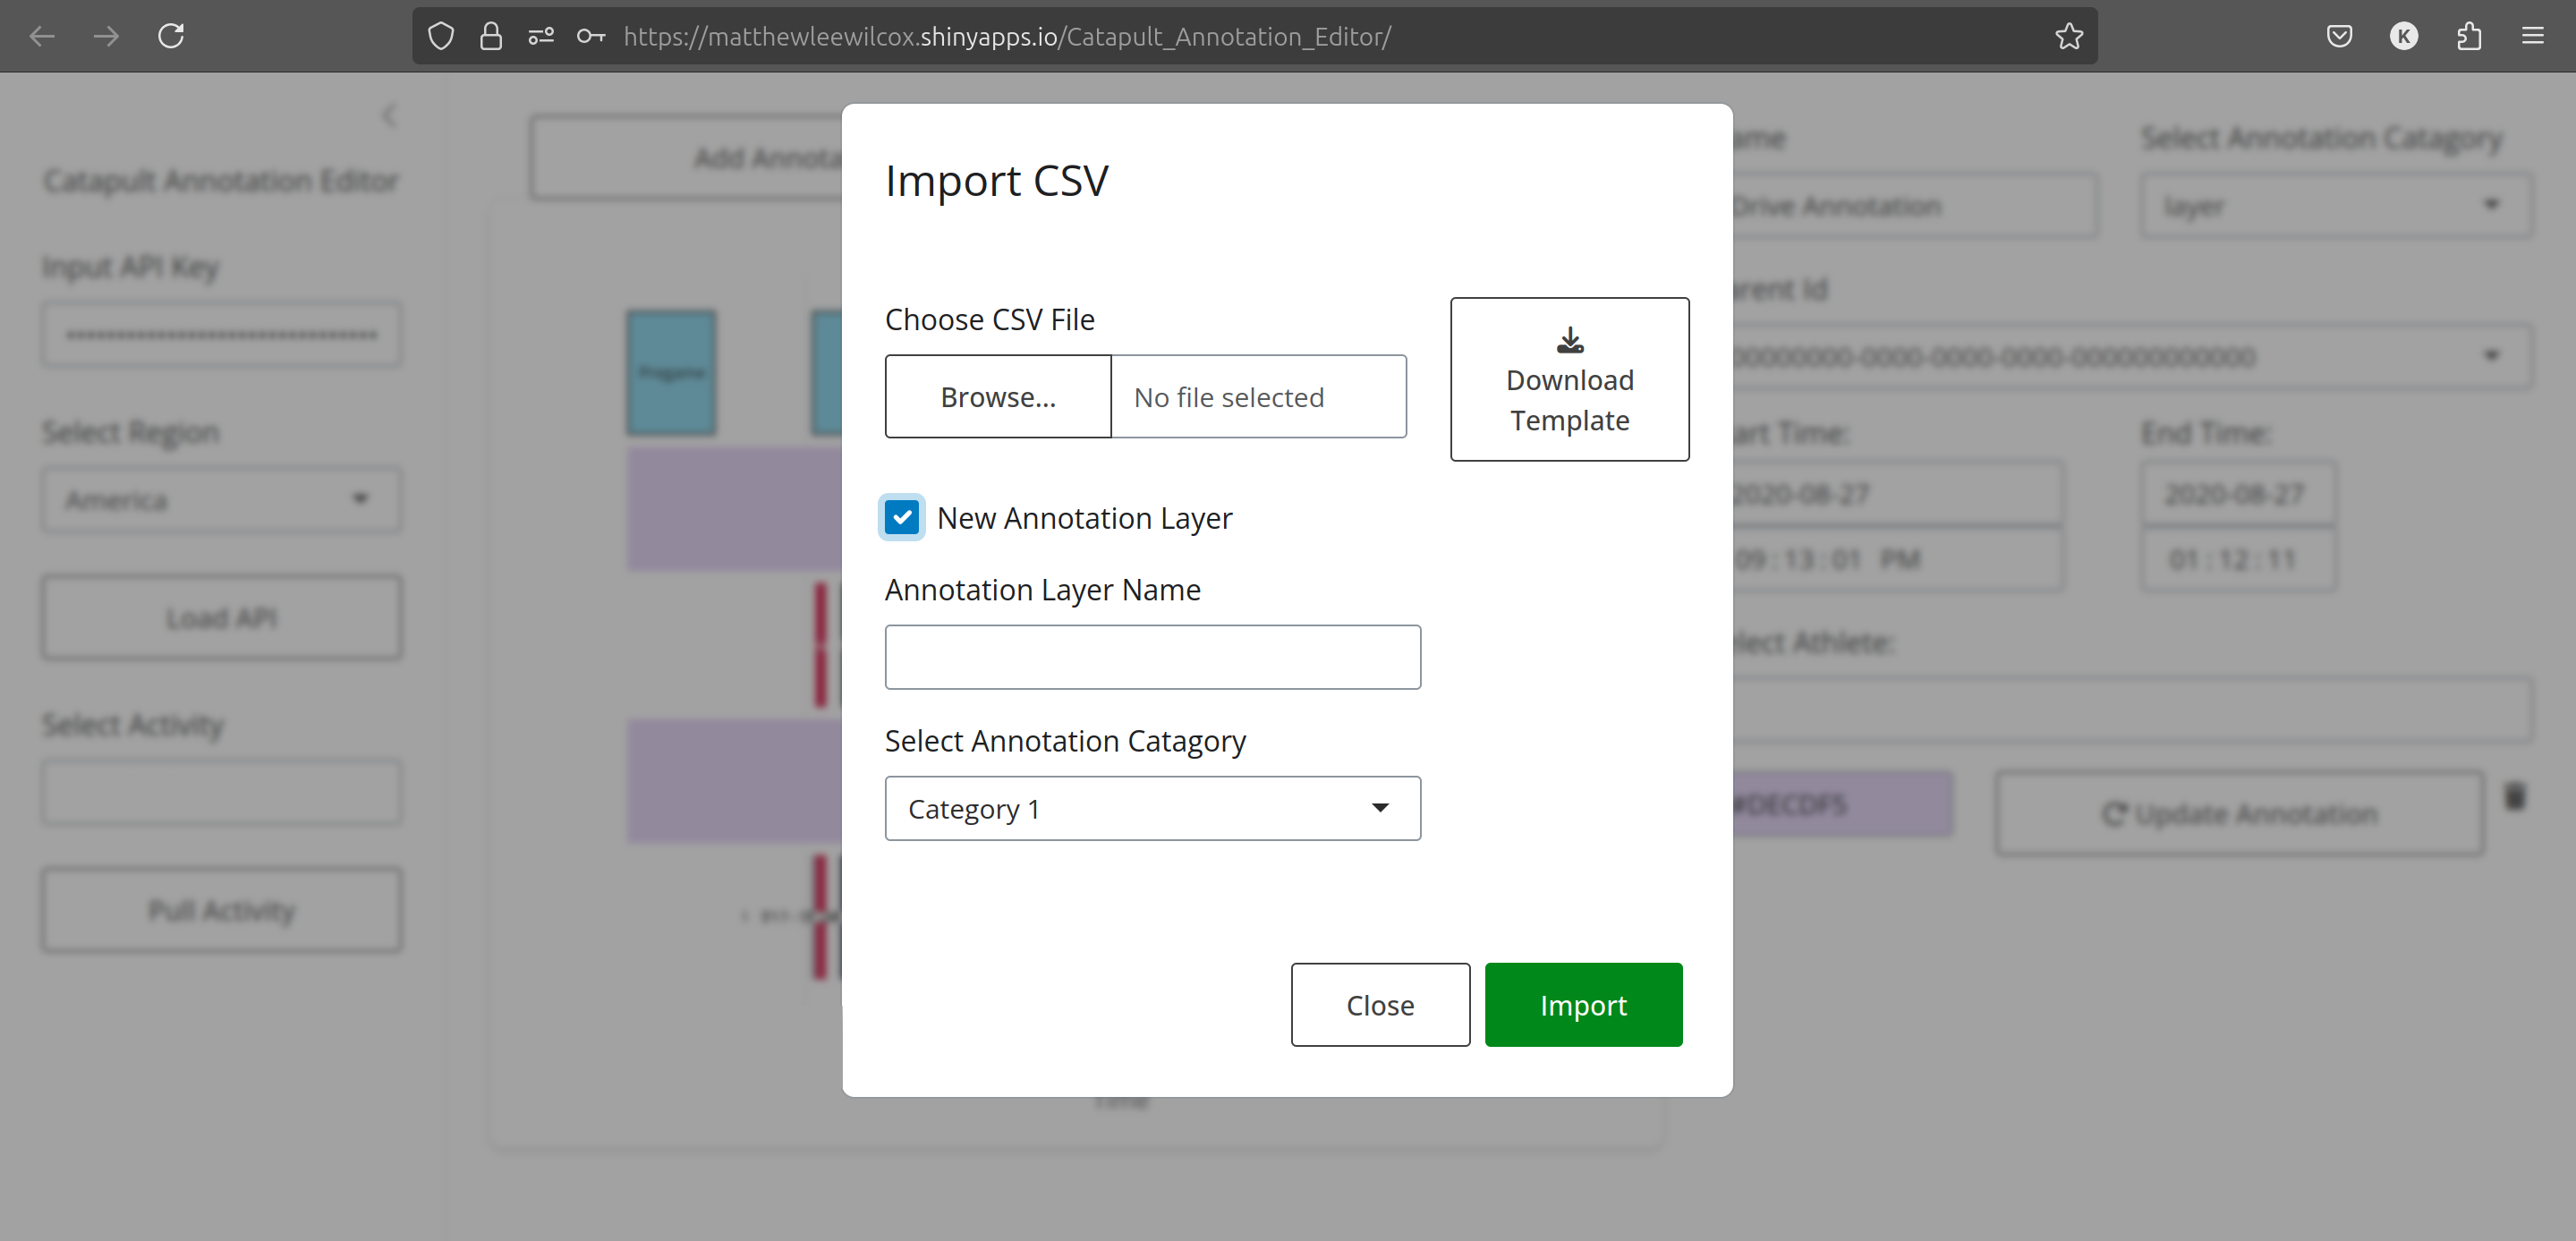 Bulk import — step 1
 Bulk import — step 2
Deleting Annotations
Select an annotation in the console, then click the trash can icon next to the Update button. A confirmation pop-up will appear. Once deleted, annotations are permanently removed.
 Delete annotation confirmation